Equipment: When and Why?
By Connor King, SSC
Once you have your main equipment (bar, plates, and rack) set-up up in either your garage or your local gym, you have almost everything you need to begin your journey towards a stronger you. However, there will be additional equipment needed to get the most out of your training.
Let’s discuss some optional and some not-so-optional equipment that will make your strength journey more productive.
No Shoes, No Shirt, No Squat
SHOES
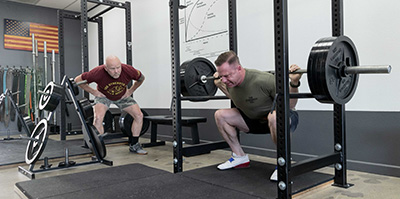
Your first substantial equipment investment should be your first pair of lifting shoes. You shouldn’t delay the start of your strength journey just because you don’t have a pair. But it would be wise to invest in a pair as soon as you decide to commit to strength training beyond your first couple sessions. If you already know this is something you want to do, get a pair ASAP. I’ve never met a lifter who preferred to squat without a lifting shoe after trying a pair.
You should squat in lifting shoes for the stability and protection they provide. One you strap them on for the first time you will feel a more flat and stable surface. You will also feel that they are built with the platform in mind and not much else. They are heavy, stiff, and connect your loaded body to the floor and transmit the force you are producing more efficiently. Just as importantly they protect your feet in a room where heavy things are lifted (and occasionally dropped).
Balance & Stability
While your running shoes or cross trainers may be comfortable, light, and stylish, they aren’t designed for lifting and will actively work against you as you try to remain in balance with the loaded barbell.
You should squat, press, and bench with lifting shoes. Like most, you may benefit from deadlifting in standard lifting shoes (½ inch heel) for the additional quad recruitment although some lifters with short tibias and long femurs choose to deadlift in flats. As a novice you shouldn’t be hung up on this and deadlifting in your lifting shoes is probably fine.
Look for a lifting shoe with a raised heel, midsole strap, and a hard sole that does not compress under load. The shoes should fit snug and not allow your feet to slide around inside. Expect to pay around $50 for an older design, a less popular color, or a rarer size. Expect upwards of $200 for the newest model of Adidas and Nike. Do-win by Rouge is highly recommended by gym members at around $125. If you treat your shoes right and only wear them on the platform, they’ll last a long time.
SHIRT
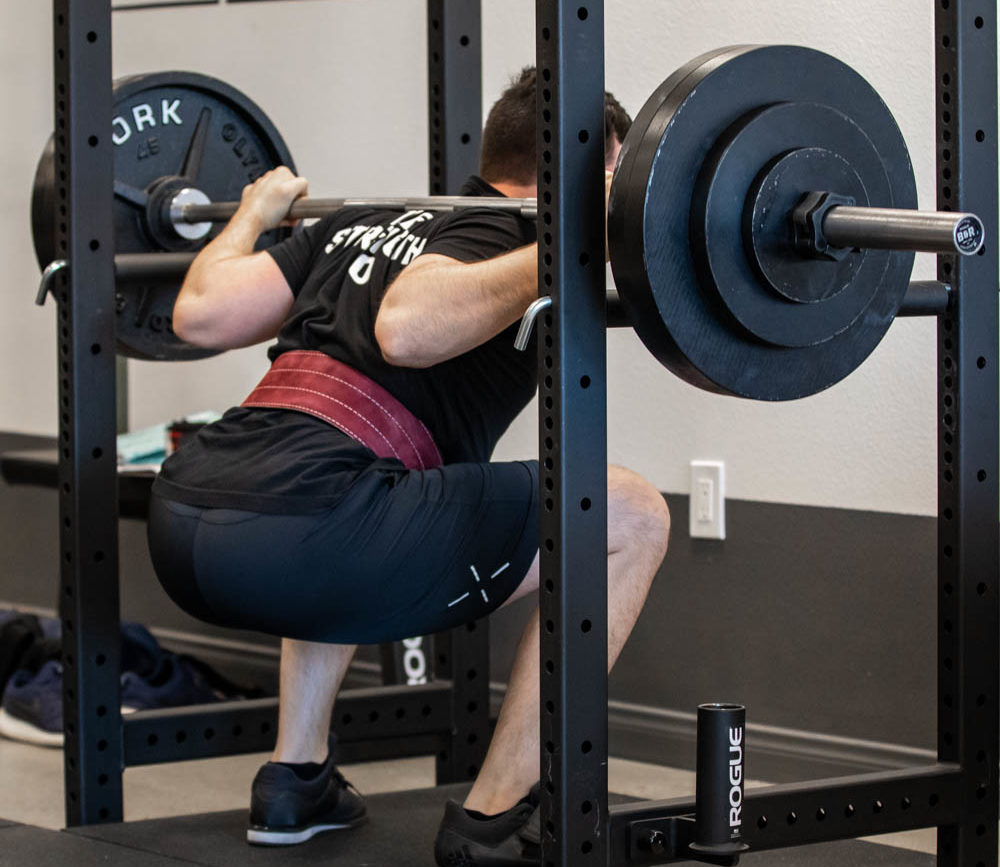
On your first day of training, plan on wearing a 100% cotton t-shirt mostly due to its importance in the squat. In the low-bar squat, the bar should sit in a stable position just under the spine of the scapula. Shirts that aren’t 100% cotton present a stability problem as the bar tends to slip and slide around during your set.
Shirts protect your back.
This is often seen with shirts made from synthetic materials. Polyester “dry fit” shirts are comfortable, light, and great at wicking sweat, but they make it difficult to keep the bar in place. A cotton t-shirt that covers the entire back is preferred over a tank-top because the former provides a better grip on the bar than a sweaty back (and also keeps your training area more sanitary).
Other Essentials
LONG SOCKS or PANTS
Another day 1 essential is comfortable pants/sweats/tights that don’t limit your range of motion OR knee high socks if you’re wearing shorts. This is essential for the deadlift. When deadlifting you‘ll be asked to “drag” the bar up while in contact with your legs.
Regardless of perceived toughness, I find that self-preservation instincts prevent most lifters from truly dragging the bar up bare shins. Covering your shins with socks or pant material will help keep the bar in contact with your legs during the lift.
Protect your legs.
You’ll reach a point in your training when you aren’t deadlifting everyday. Feel free to wear short socks and shorts on days you’re not deadlifting or power cleaning.
TRAINING LOG
As a successful lifter you need a consistent place to record your training numbers and track progress. Buy a cheap composition book or notebook and bring it with you on your first day of training. Unlike an app, your training log will never crash or need an untimely update during a training session. Track the date of your session, the exercise, the weight lifted, how many reps and for how many sets.
In addition, track feedback from your coach such as recommended weight increases for next session, helpful cues, or other programming changes. It may also be helpful to track your weekly body weight or measurements. You should be able to neatly organize multiple sessions on one page.
Having a complete record of your training will help keep you focused and efficient, not to mention feeling accomplished while flipping through and taking note of your progress. Start logging your training on your very first session. More on training logs here.
Chalk It Up
As a novice lifter, consider adding weightlifting chalk to your gym bag early on and preferably by your first session. Forgetting your chalk is not a valid reason to delay or skip a training session but applying a layer to your hands before your heavy lifting can be a difference maker for success. Chalking your hands will instantly remove moisture and add traction between your hands and the bar leading to a more secure grip and keeping problematic calluses in check.
Hopefully you are training in a place that values proper strength training and in turn allows chalk. Be responsible and don’t rely on others to provide it. A brick of chalk within a bucket or gallon zip lock bag works great. A chalk sock or quick dry liquid chalk can be substituted if you are really worried about a mess. You don’t have to get crazy by caking on excessive amounts and causing a dust cloud. A thin but visible layer on the surface of your hands prior to your sets is fine. Apply chalk to your hands rather than your equipment.
Chalk is cheap and available from most online retailers or sporting good stores. Searching for “Gym chalk, weightlifting chalk, gymnastics chalk, or magnesium carbonate” will get you in the right direction. Don’t overthink this one.
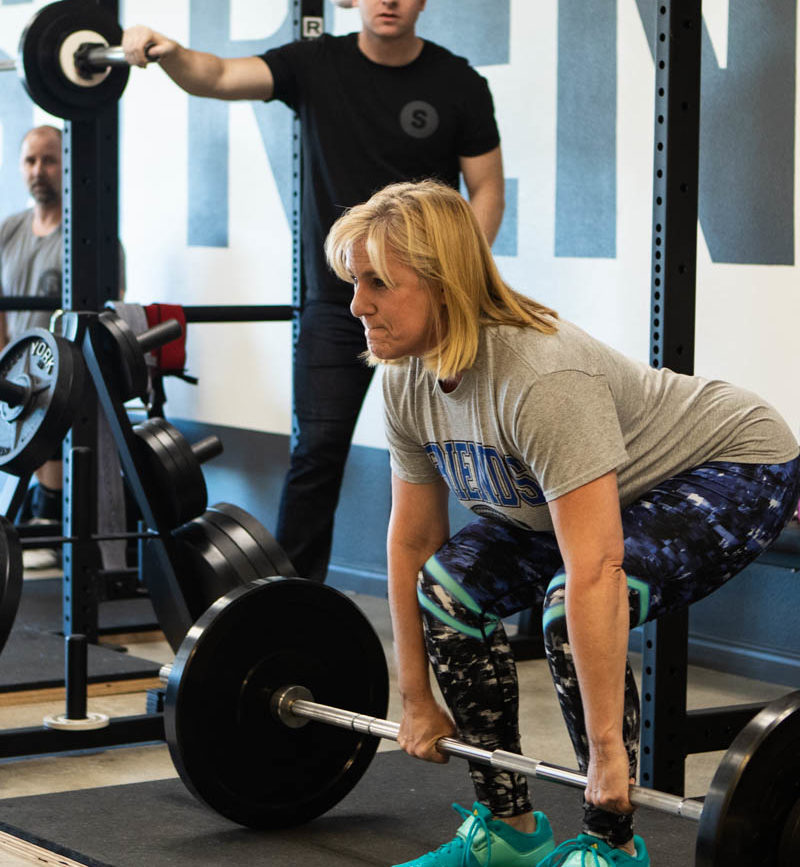
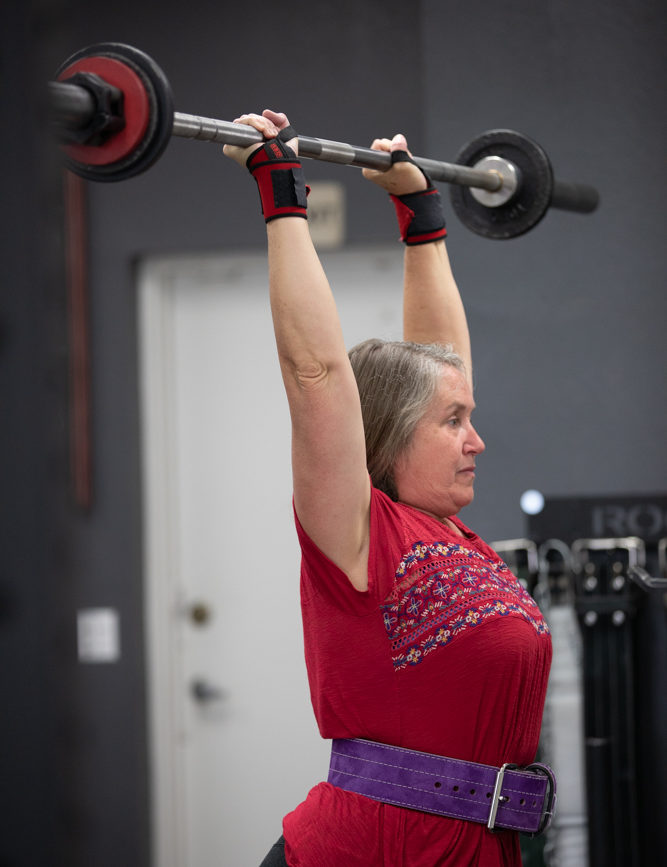
Adding a Belt
After you’ve committed some time and effort to your novice training (few weeks to a month for most) you or your coach may decide to incorporate a lifting belt during your heavy sets. In the main barbell movements, a belt will assist you in increasing pressure against your spine leading to a safer and more efficient lift.
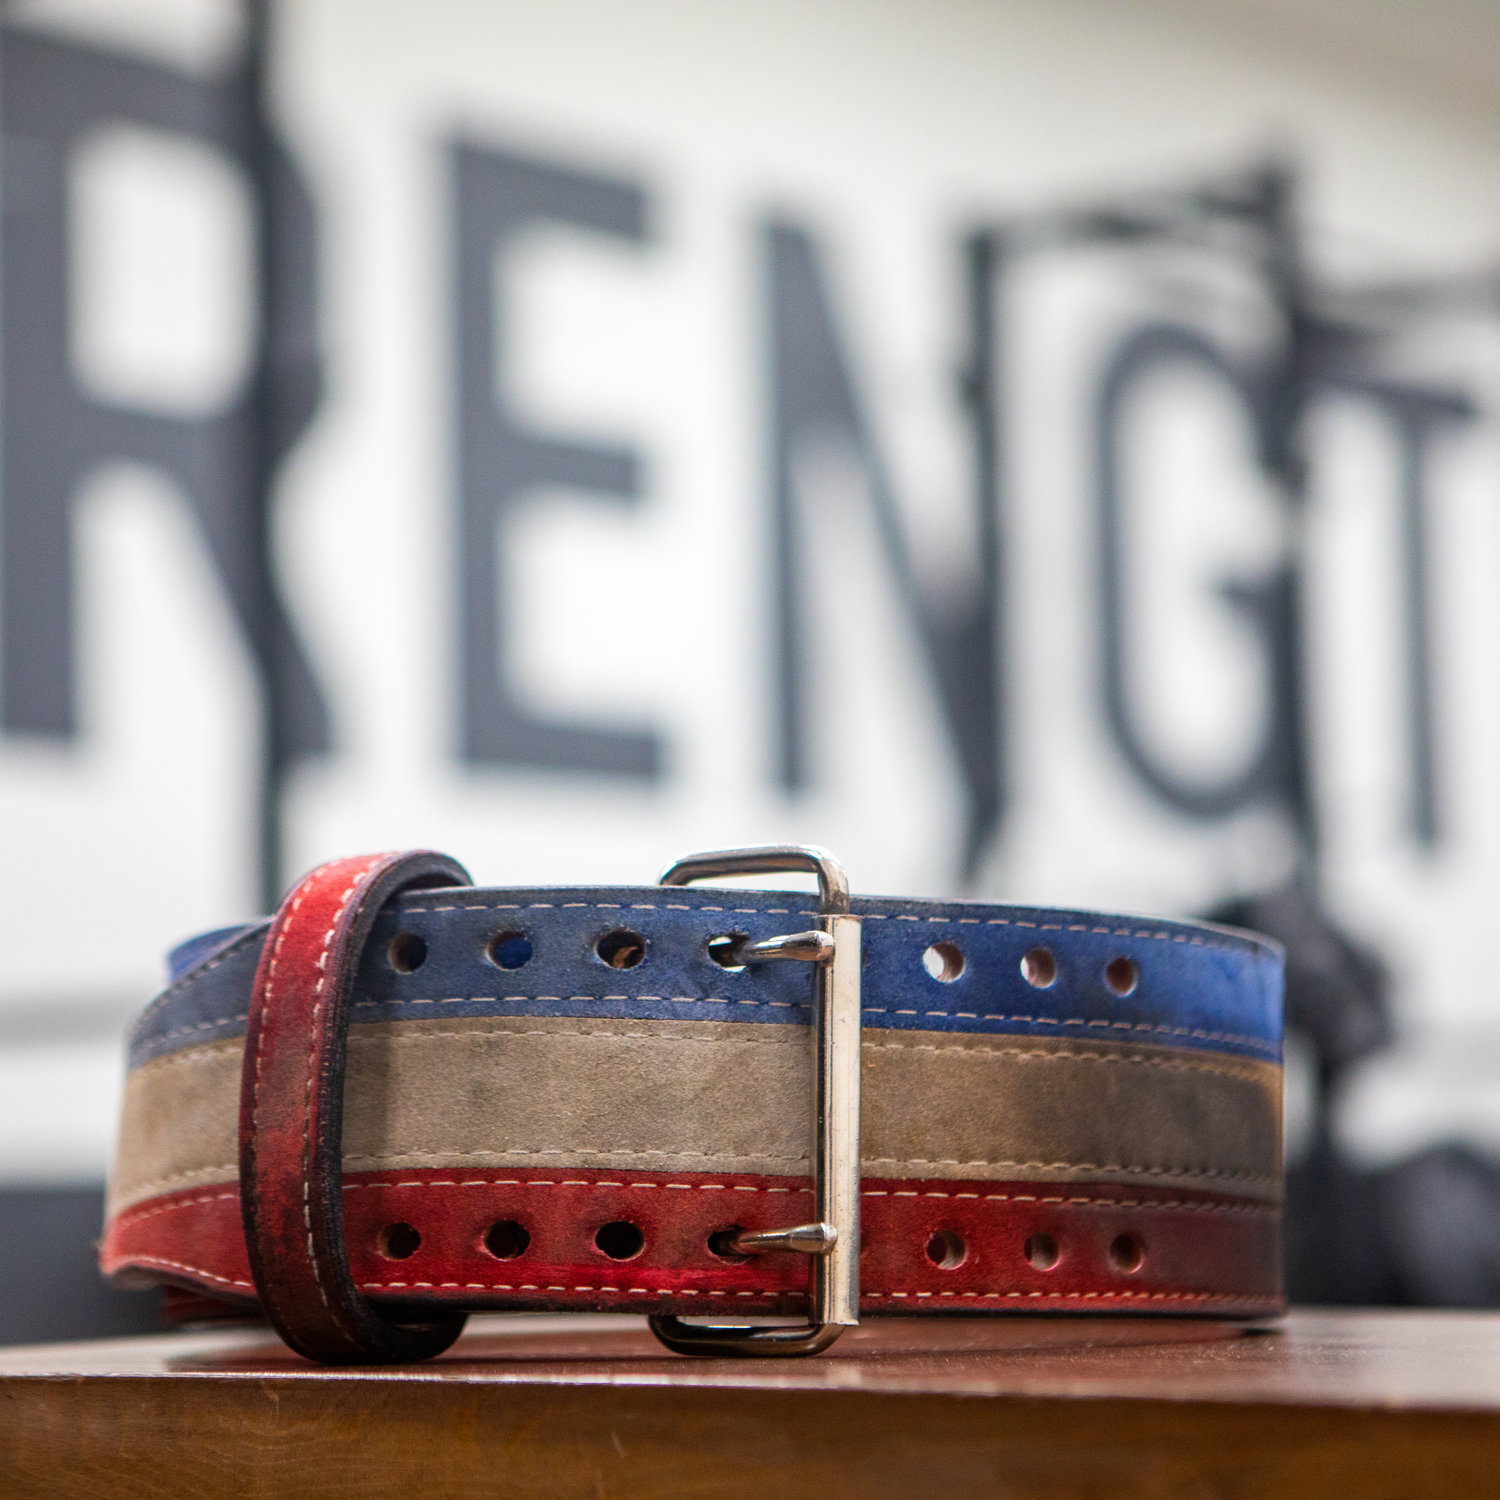
American Belt.
Using a belt is not considered cheating, a crutch, and will not lift heavy weights for you. Within your first weeks of training you should learn how to successfully breath and brace your abdominal muscles under a load. As you progress and are able to handle heavier loads, the tightness of a belt will allow you to contract your muscles harder than if you weren’t wearing one. This will lead to increased intra-abdominal pressure and a more stable spine during the lift.
A belt should cover your torso above your hip bones and below your ribs and feel noticeably tight. You may have to play around with its positioning during your first couple sets. If it is painful or impeding your breathing then it is too tight. If you find yourself forgetting to take your belt off immediately after a set then it is too loose. Take note that most novices will begin by wearing their belt too loosely. If utilized correctly, you should notice an immediate difference in your ability to “stay tight” while bracing during your loaded movement. Wear your belt only for your last warm-up and for work sets. Your selected belt tightness can vary slightly depending on the exercise.
Choose a leather belt that is the same width all the way around and uses a heavy-duty single prong or lever buckling system. Stay away from anything tapered, padded, or velcro.
Most people will choose between a 3 and 4 inch wide belt depending on their build/torso length and may even alternate between these sizes depending on the lift. Thickness can range from 10mm to 13mm. 10mm is more popular and is sturdy enough to meet nearly everyone’s needs.
A good belt can run you just over $100 or more depending on how much customization you’re looking for. Our gym likes “Best Belts” as they tend to have the quickest turnaround and are a good value. At The Strength Co. we have produced a 100% American made custom lifting belt that we are very proud of.
But what about all the other stuff?
Although not necessary for the majority of novice lifters, you should know the purpose of the following equipment should you choose to incorporate it down the road.
KNEE SLEEVES
Some lifters use knee sleeves (not wraps) in the squat for a couple reasons. Sleeves provide warmth and compression, making the movement feel better on the knees (especially for master lifters or those with past injuries). I also find that for myself and others, the tight proprioceptive feedback from the sleeves helps fix minor knee related form errors.
Sleeves come in a few sizes based on simple leg measurements. They are tube-like, pulled over the foot , and most often made of neoprene. A good pair costs $30-$50 with “the top of the line” being around $90.
WRIST WRAPS
Wraps help keep your wrists stable.
A wrist wrap acts as a tight cast for extra support during movements when the wrists are in compression (press, bench press, thumb-under grip of a squat). Wraps help lifters prevent overextension of the wrist under heavy loads and are also for lifters who want the extra support due to a past or current injury. The feeling of extra tightness as if someone is squeezing your wrists can serve as a tactile cue for someone to maintain relatively neutral wrists.
As a novice lifter, you still need to learn how to maintain neutral wrists before considering using wraps. When that time comes, you should wear them no sooner than your last warm-up set. Most wraps consist of an elastic body, thumb loop, and velcro closing system. Most companies will offer a couple lengths and maybe even a “stiff” and “flexible” option. Price range is $10-$40.
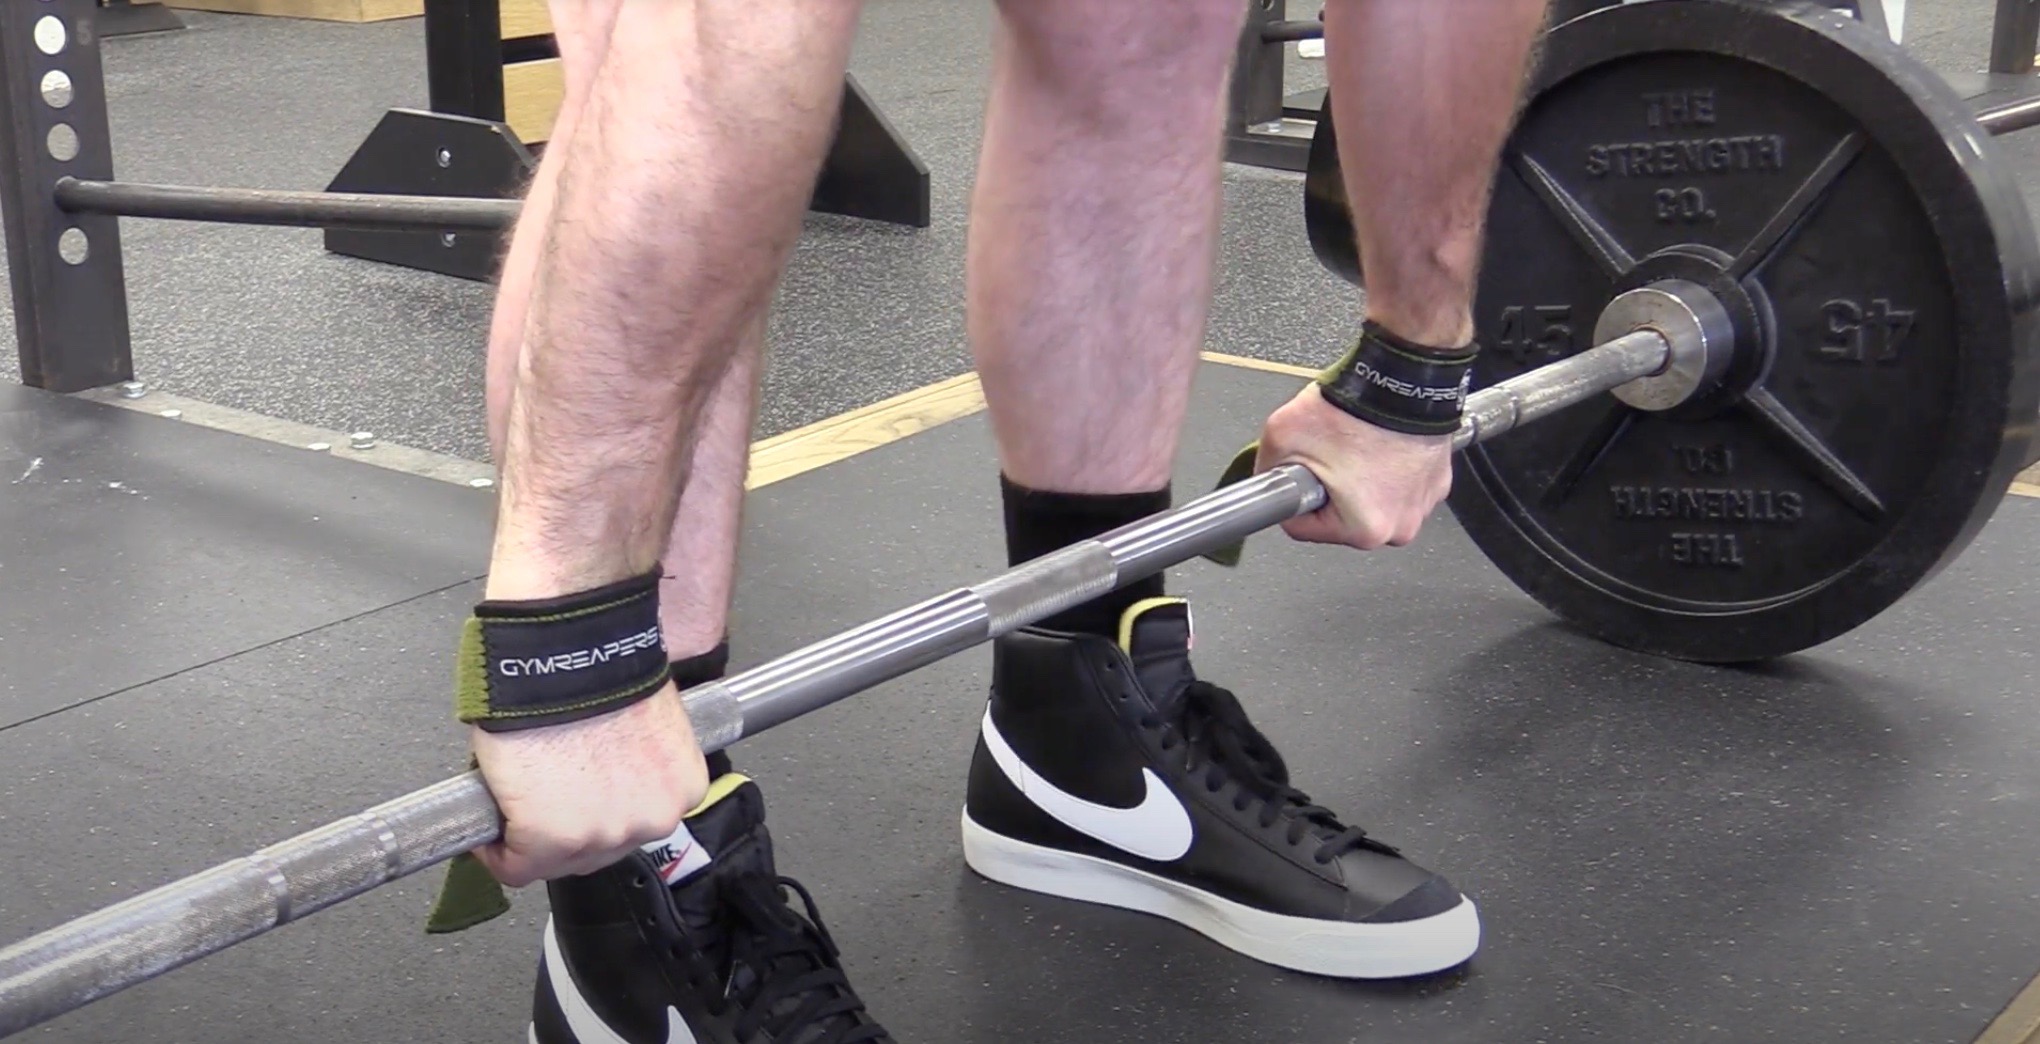
LIFTING STRAPS
Lifting straps or “wrist straps” are used in the deadlift and its variants when the lifter’s grip strength limits the amount of weight lifted or sets/reps completed. Introducing straps at an appropriate time can help continue to get the rest of the body strong.
As a novice lifter you should not incorporate straps unless your grip is compromised by injury or another unique circumstance. If your grip begins to fail, have a coach teach you the hook grip technique or the less preferred alternate grip. Save the straps for those further along in their training, as even they should be using them sparingly.
You can make straps yourself with two 18 inch strips of very sturdy material such as seatbelt webbing. I will caution you against the commonly sold straps that consist of a loop that feeds one end of the strap through. These tend to self-tighten through your set and make it difficult to remove yourself from the bar quickly if needed. Your straps should “let go” at the same time your hands do.
In conclusion…
I hope this clears up some confusion regarding equipment purpose and priority. I recommend checking in with a coach prior to making a purchase to be sure you are choosing equipment that aligns with your goals, training advancement, and personal preference.
Keep in mind that there are no hard and fast rules for everyone when it comes to certain equipment use. Use the following as a general guideline and prioritize the guidance coming from a qualified coach that is familiar with your training.
Training Log : Day 1 or ASAP
Cotton T-shirt : Day 1 or ASAP
Long Socks or Pants : Day 1 or ASAP
Chalk : Day 1 or ASAP
Belt : After a few weeks to a month of training for most.
Knee Sleeves : Optional and no sooner than first months of training for most.
Straps: Needed when/if your grip becomes the limiting factor of training.
Wrist Wraps: Optional and no sooner than first months of training for most.